Request a Two-Way Shift Trade
Available as of application version 7.2+. A work code must be configured as a Two-Way Trade work code in order to follow the steps in this task. Two-way trades allow the payback half of the shift trade to be supplied at the time the shift trade is initiated. Therefore, it is important to understand your organization’s shift trade and payback policies before you add a two-way shift trade.
For example, a trade policy may state that a trade must be paid back within the same pay period, or within 90 days, and so on. When configured the application will stop the trade if the user adds the trade outside the trade rule limits. As such, the behavior of a two-way shift trade is configured by your organization. The application will prompt you when inputs are required.
| Important |
|---|
| Multiplet two-way trades are not supported
when multiple days are selected. Each two-way trade transaction
must be entered one at a time. Each two-way trade results in four
work codes linked together. Edit Behavior: Editing a two-way shift trade work code detaches the linked work codes as of application version 7.3.5.2 Dimensions Integration: Labor category entries are supported using two-way shift trades as of application version 7.2.2. |
To request a two-way shift trade:
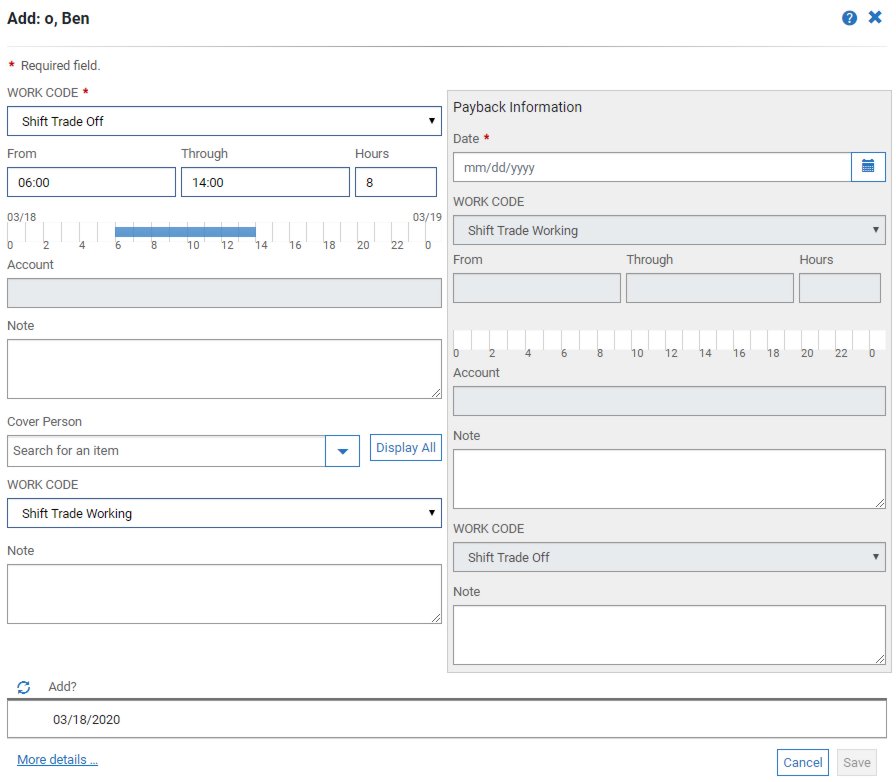
- In Work Code*, select your shift trade type work
code from the drop-down list. Typically labeled: Shift Trade
Off or Exchange Off. If a detail code, account, or a note is
required the system will prompt you to enter the information.
The two-way trade panel displays two panes, the first pane on the left is the initiating work code, the second pane on the right is the Payback portion. Fields in the Payback pane enable based on user input and work code configuration.
Depending on your business rules the trade will either be automatically approved or require approval. If your trade requires approval, you will see the asterisk to denote a pending request.